
Global Entry is life-saver when you’re coming back into the U.S. after international trips and you stumble upon a ridiculously long customs line. Global entry not only offers you way for you to zip through customs when coming back into the United States, but it also provides you with TSA Pre-Check so you can zip through TSA security when departing on both domestic and international flights. Here’s a guide on what you need to know to apply for Global Entry.
Set up a GOES account
The first thing you need to do is to sign-up for a GOES account. Here’s the website for GOES (which stands for Global Online Enrollment System). You’ll use a GOES account to process your application for Global Entry and it can be used for other related programs, such as NEXUS.
Setting up a GOES account is very easy and should only take you a minute or two to complete.
The first thing it will ask you is if you have ever applied for Global Entry, NEXUS, SENTRI, U.S. / Mexico FAST, U.S. / Canada FAST. Make sure you don’t forget to include this information if you have applied before because it can really screw up your application and perhaps prolong the application process.

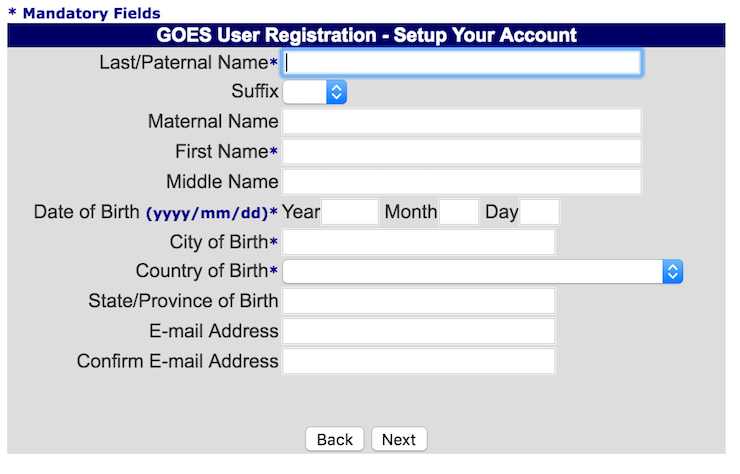
On the next couple of screens you’ll input all of your necessary contact information and set up your password and security questions. It’s all straight-forward and shouldn’t be a problem.
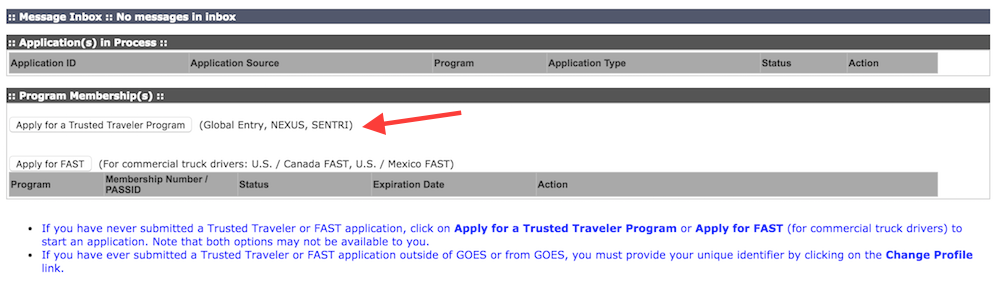
Once your GOES log-in account is created, you will log back in and then be taken to the screen below. You will then click “Apply for a Trusted Traveler Program.”
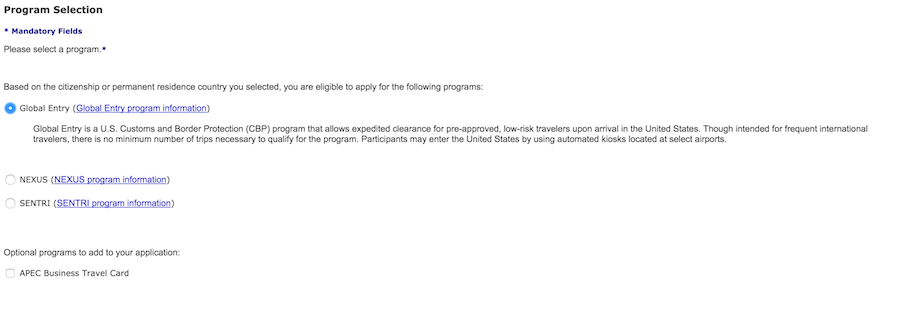
You’ll be asked if you’ve ever applied for any of the programs and assuming you hit no, you’ll begin the application. They will ask you a couple of quick questions like how you heard about the program, your citizenship, and then they will provide you with options for your application based on what you submitted. Be sure to select Global Entry assuming that pops up for you.
 The next screen will provide you with all of the enrollment centers in your state. You should take note of the enrollment centers near you for your future reference so that you can more easily schedule your interview when it is time and perhaps call in to inquire about their walk-in policies. If you live by a major city, you shouldn’t have to go far for an interview but if you live outside of most major cities, you may have to travel a couple of hours to get to the nearest available enrollment center.
On that same screen, scroll all the way down to the bottom to confirm your intent to enroll in Global Entry.

Begin the official Global Entry Application
Once you hit that button, you will officially begin the Global entry application. You can see all the different steps you’ll have to fill out below:
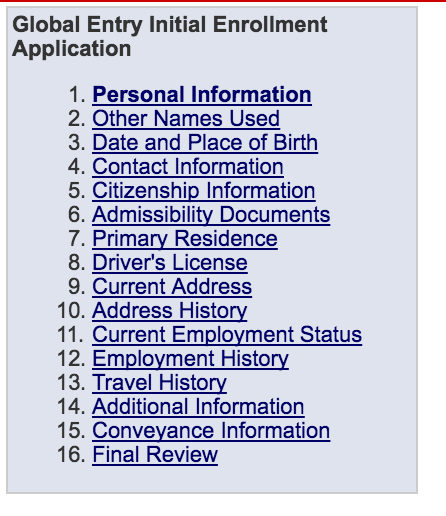
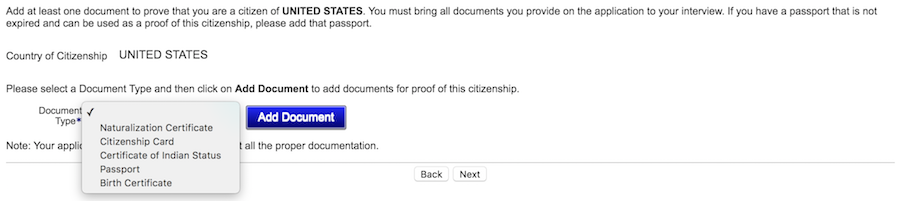
You should breeze through the first options but be sure you put down the correct information for your “Citizenship Information.” This is how you will prove that you’re a U.S. citizen.
For most people, I recommend choosing to use a passport because it’s the same document that will be required for your “admissibility documents.” Keep in mind that whatever documents you include in your application, you’ll have to bring to your interview.
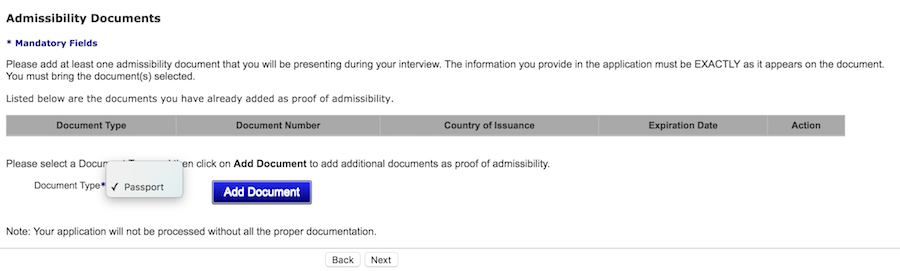
Next you’ll have to provide your “admissibility documents.” There’s only one selection that appears and it’s for your passport so enter in that information to advance to the next screen.
Next, you’ll put in some pretty straight-forward information like your primary residence, diver’s license, and current address, all easy stuff.
Employment and address history
Then, comes the most potentially time-consuming portion of the application.
If you’re like me and have lived in tons of different places in recent history and had quite a few jobs/internships, you’re going to have a lot to fill in. If you haven’t rounded up all this information before, it would be a good idea to make a list of all of the places you have lived and worked for the past 5 years.
Travel history
Next, you have to put all countries you’ve travelled to in the past 5 years other than the United States, Canada, and Mexico.
I actually forgot to mention a country when I filled out this portion of my application but was able to update the information at my interview. So if you happen to slip up and forget about a country, just try to bring it up at your interview. I doubt it will be an issue unless you tell them something like you “accidentally” forgot about your monthly runs to Iraq and Syria.
Additional Information
Finally, a very important section comes up: criminal history. Make sure you answer this question honestly and hopefully your answer to these questions will be no.
It’s been stated by officials of United States Customs and Border Protection that “any type of criminal conviction would disqualify someone” for Global Entry. Some people have had luck with being approved with expunged misdemeanors from their days as a minor but those seem to be in the minority. The reality is that in the majority of cases, if you have had any type of misdemeanor and definitely a felony in the past 10 years (and maybe even longer) you will probably be denied.
If you are denied for such a reason, you can write an official appeal letter but the general consensus with an appeal is that you have a slim to none chance of getting a decision overturned.
And remember, there’s no refund for the $100 application fee if you are denied.

After one more question you’ll be at the end of the application and just need to perform the “final review.” Take a close look at your answers to make sure everything is accurate and then you’re ready to submit your application.
Pay the $100 fee
When you submit your application you will be prompted to pay your $100 fee.
There are many credit cards that provide you with a $100 statement credit that can be used toward Global Entry, such as the Platinum Card from American Express, the Ritz-Carlton Card, and the Citi Prestige, just to name a few. With cards like the Platinum Card, you simply pay for the application with your card and await the statement credit with no further action necessary.
Going to “review”
After you pay the fee, your application needs to be “reviewed.” It varies with how long it might take for your application to be reviewed. Most of the time it seems to take one week, but it could be just a couple of days or maybe even a couple of weeks. Just be on the look out for an email from GOES during this time and/or log-in to your GOES account to check your account status.
Conditional approval letter
If you pass this review, you’ll receive an email to log-in to your GOES account for an update on your application. You’ll then see that you’ve been conditionally approved!
The letter from Global Entry will state:
We are pleased to inform you that your U. S. Customs and Border Protection, Global Entry membership application has been processed and you are now invited to visit an enrollment center to complete the enrollment process.
In order to finalize your Global Entry enrollment, you must schedule your Global Entry Interview within 30 days of the date of this letter. You do not have to complete the interview within 30 days….
It will also tell you to bring the following original documents with you to the enrollment center:
- A valid passport. If you travel using more than one passport, please bring them to the interview so that the information can be added to your file.
- A permanent resident card (if applicable);
- Documents providing evidence of residency. Examples are: driver’s license (if the address is current), mortgage statement, rental payment statement, utility bill, etc.
Personally, I just brought a driver’s license (because my address was current) and passport to make it easy but bring whatever qualifies and makes you comfortable.
Although it doesn’t tell you in the conditional approval letter, you need to bring a copy of the conditional approval letter itself to the interview with you!
Once you schedule your interview, you should get an email reminding you to bring this document, but go ahead and print it out as soon as you can and try to remember to bring it. (I’ve heard of some agents getting really irritated when applicants forget to bring the letter to the interview.)
Another thing, the Global Entry membership number in your conditional approval letter will be your official Known Traveler Number in the future if you get approved, so it’s also a good idea to go ahead and take down the information. (This will be the number you insert into all of your frequent flyer accounts online so that you’ll be granted TSA Pre-Check.)
The interview process
So once you’re conditionally approved you can finally schedule your interview. Remember, you must schedule the interview within 30 days — not actually attend it within 30 days.
July 9, 2017 update: You can take care of your interview returning to the US at select airport locations.
The availability for interviews varies across the country. I got in within about a week but others have been forced to wait months.
If you are facing a long wait time but you want to get in earlier just try to log-in continuously to schedule an interview since cancellations happen all the time. You could also do some research to see if any of the facilities near you allow walk-ins. Many will probably state that their official policy is no walk-ins but (although I don’t encourage it) you can always take a chance and just show up if you really want to. People did this at IAH and were able to get in even on a busy day.
During my interview they asked me very basic questions and the entire process only took a few minutes. They asked me questions like:
- “What’s your occupation?”
- “Do you travel for business or pleasure?”
- “Do you travel with a family?”
After just a few questions, they took my photograph and fingerprints and I was done.
Some facilities will require you to watch a short video on Global Entry but that was not the case for me. If you want to read more about my Global Entry interview experience in Houston click here.
Approval
Some applicants will be be approved right at the conclusion of their interview but others will have to wait to receive an email regarding their approval. My email came about 5 minutes after my interview but it could take longer for others.
Once you’re approved you are free to use your Known Traveler Number for all itineraries and it’s good for five years! If you’ve already made a booking you may have to call in to certain airlines to get it added to your itinerary (looking at you Southwest Airlines).
A few weeks after you’re approved, you should receive your ID card in the mail. It’s an official government ID so it can be used for a lot of things in place of your diver’s license but you don’t need it to use Global Entry in the airports. As far as I know, the only time it would be requires is at certain land crossings at the border of the U.S. and Mexico or Canada.
Daniel Gillaspia is the Founder of UponArriving.com and the credit card app, WalletFlo. He is a former attorney turned travel expert covering destinations along with TSA, airline, and hotel policies. Since 2014, his content has been featured in publications such as National Geographic, Smithsonian Magazine, and CNBC. Read my bio.
I have a valid global entry card, but I have a new passport and my address has changed. I tried to update it online but their website doesn’t work. I type in the new info and when I click on Submit it goes right back to the old info.